Gravity Forms Entry Blocks
Early Access
This perk is still undergoing active development as we progress towards a public beta. It is available for early access to any Gravity Perks customer.
What does it do?
Gravity Forms Entry Blocks adds a new block to the WordPress Block Editor for displaying and editing entries. Use a standard variation like the Entries Table to display a list of your entries or completely customize your layout with the Entries Loop and hundreds of supported blocks.
Features
- Display Gravity Forms entries on the frontend.
Let users view entries anywhere on your site. Display entries in pages, posts, and even widgets! - Edit entries with ease.
Edit (and delete) entry data on the frontend without requiring access to the WordPress backend. - Fully customizable layouts with multiple default variations.
Display entries in a table or build your own block-based layout with the Entries Loop. - Harness the power of the Block Editor.
Built for the Block Editor with support for hundreds of blocks out of the box. - Automatic updates.
Get updates and the latest features right in your dashboard. - Legendary support.
We’re here to help! And we mean it.
Documentation
- How do I enable this functionality?
- Layouts
- Entry Query
- Filters Block
- Permissions
- Using Entry Blocks in the classic editor and other page builders.
- Known Limitations
- Integrations
- Hooks
How do I enable this functionality?
After installing and activating Gravity Forms Entry Blocks, the Gravity Forms Entries block will be available within the Block Editor.
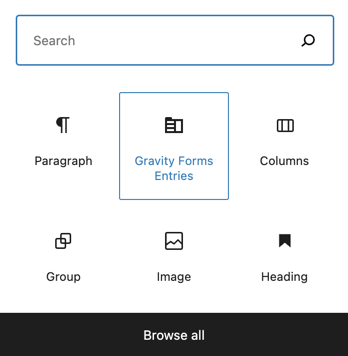 |
Add a new Gravity Forms Entries block to your post. |
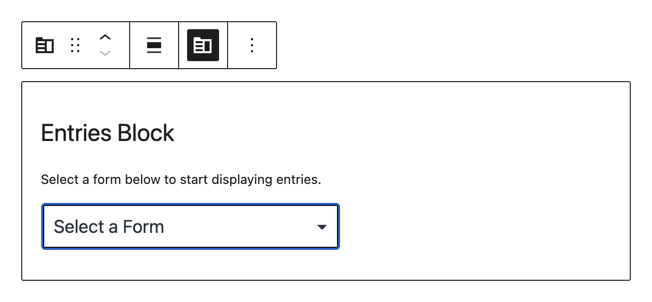 |
Select your form. |
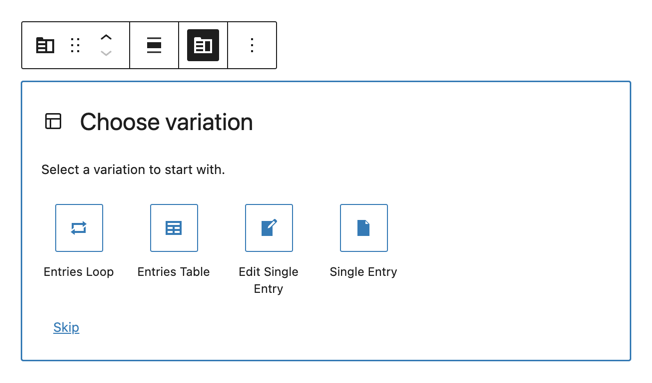 |
Choose a layout variation. |
Layouts
GF Entry Blocks offers four layout variations: Entries Loop, Entries Table, Edit Single Entry, and Single Entry. The variation is selected when adding the block to the page.
Entries Table
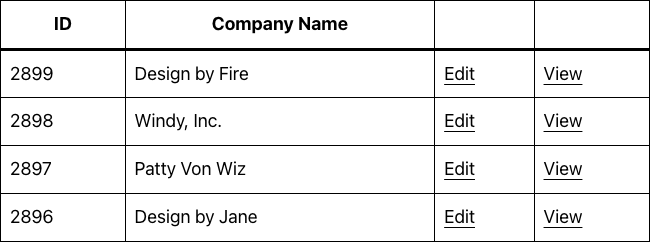
The Entries Table variation displays entries in a table format. This is a great way to display lots of entries on a single page.
Managing Columns
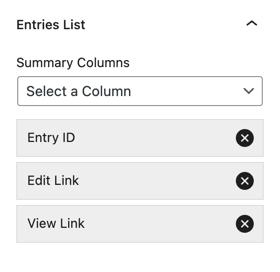
Columns can be managed using the Summary Columns setting. By default, three columns are displayed: Entry ID, Edit Link, View Link.
Add any form field as an additional column by selecting it from the columns dropdown. Once added, you can drag-and-drop the column into the desired order.
Remove a column by clicking the remove icon for the column you wish to remove.
Custom Columns
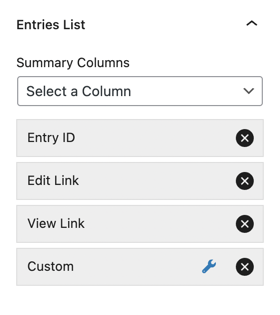
Custom columns allow you to include custom content (including merge tags) as a column in your table. To add a custom column, select the Custom option from the columns dropdown.
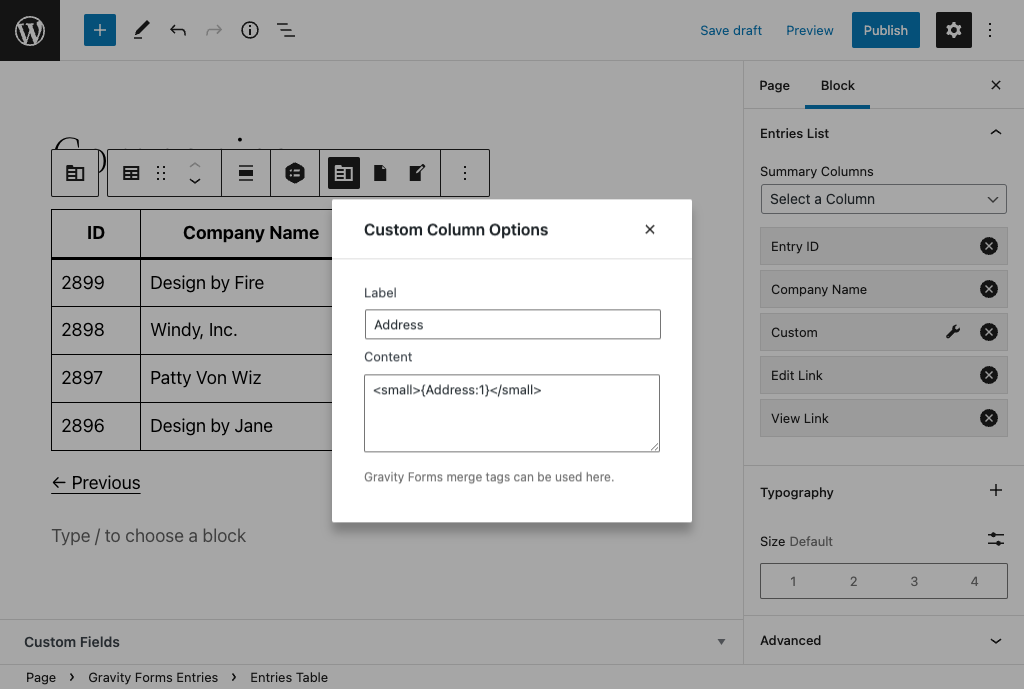
Once added, click the wrench icon to launch the custom column modal.
Custom columns can contain static content, merge tags, and HTML. For example, you could insert this into a custom column to create an edit link that displays the Entry ID:
<a href="{edit_url}">{entry_id}</a>
Entries Loop
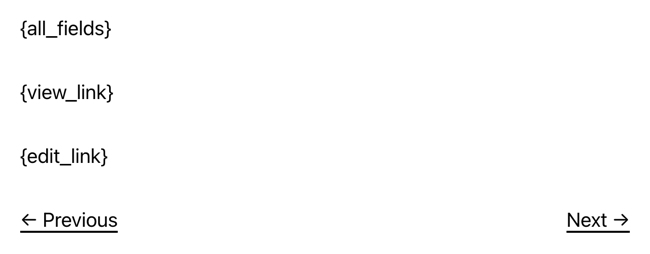
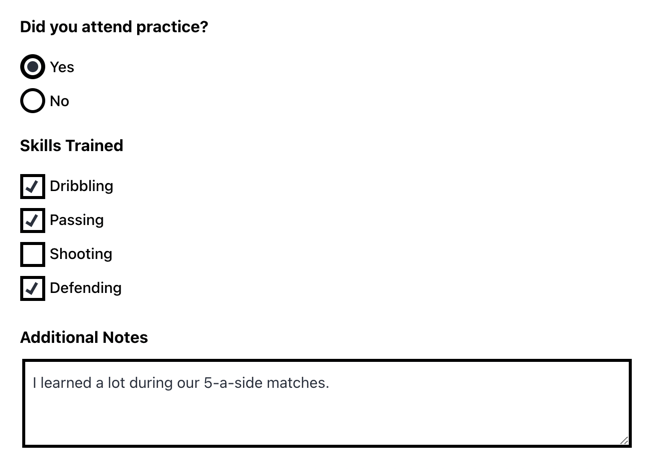
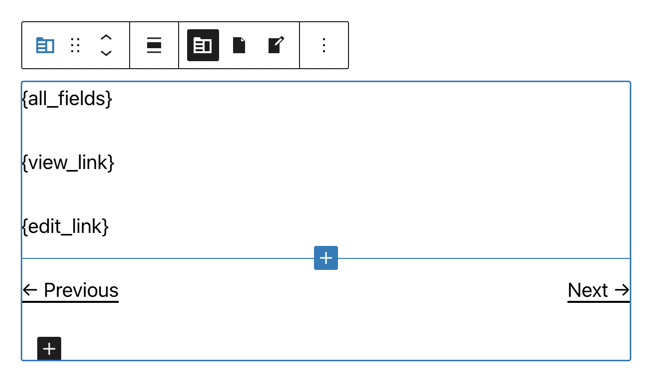
The Entries Loop variation displays entries using the {all_fields} merge tag. Each entry’s values are rendered the same as they are when the {all_fields} merge tag is inserted into a form confirmation or notification. By default, each entry will include a View and Edit link below the entry values.
{all_fields} merge tag, check out our All Fields Template.Customizing the Entries Loop
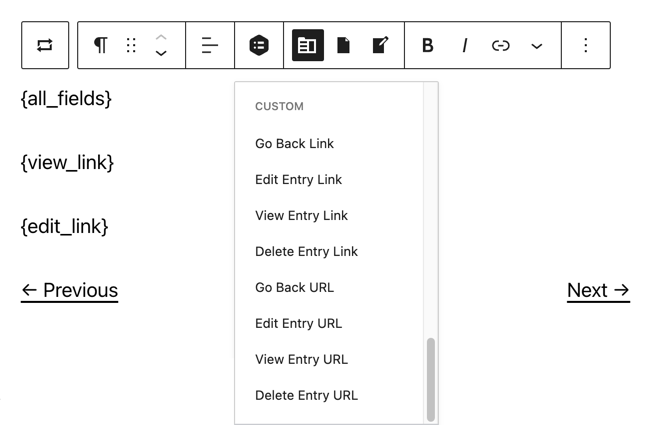
The Entries Loop is powered by merge tags. Adding or removing merge tags changes what is displayed. By default, the three merge tags displayed are: {all_fields}, {view_link}, and {edit_link}.
Click on the Entries Loop block to edit the merge tags for the block. Additional merge tags can be found under the merge tag icon.
Entries Loop and Table Views
The Entries Loop and Table layout variations consist of three views: Entries View, Single Entry View, and Edit Entry View. Each of these views can be customized using the Block Editor. To switch between the views, select the view from the block toolbar.
Edit Single Entry
The Edit Single Entry variation will display the form with a single entry pre-populated. This is identical to the Single Entry View that is available in the Entries Loop and Table variations layout, except it is limited to a single entry. By default, the entry displayed is the most recent one submitted.
Notifications when Editing
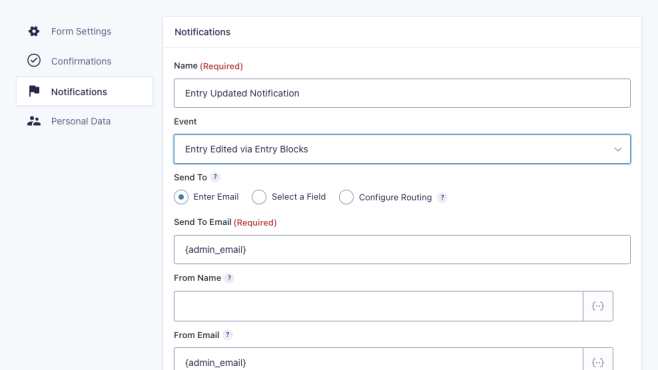
When editing an entry via Entry Blocks, the the “Entry Edited via Entry Block” notification event is triggered. Any notification configured for this event will be sent when an entry is edited via Entry Blocks.
Feed Handling when Editing
Feeds are not processed when an entry is edited via Entry Blocks. If you have a use case that requires this, we’d love to hear about it.
Single Entry
The Single Entry variation displays a single entry using the {all_fields} merge tag. This is identical to how the Entries Loop displays entries, but is limited to a single entry. Like the Edit Single Entry variation, it defaults to the most recent entry.
Entry Query
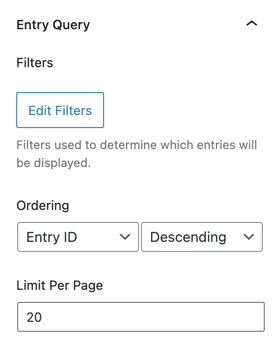
The Entry Query determines what entries are displayed in GF Entry Blocks. Each block can have its own query and supports filtering, ordering, and limits. To modify the query on a block, first select the block, then click on the Entry Blocks icon.
Once the block is selected, find the Entry Query setting on the right side of the editor.
From there, you can edit the filters, set the ordering, and the number of entries to display per page.
Filters Block
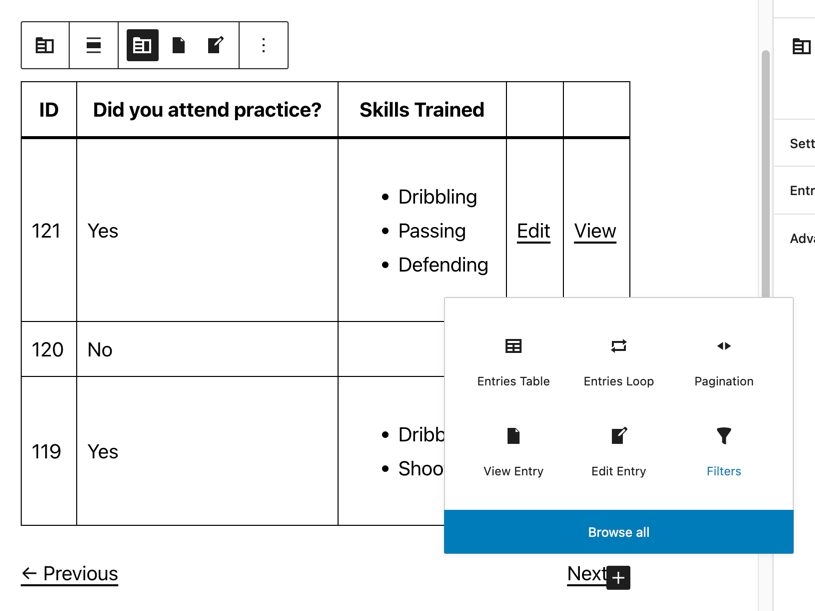
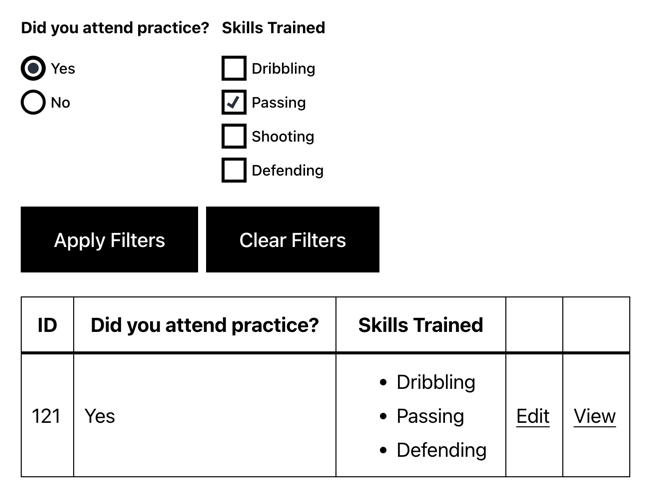
The Filters block adds interactable filters to the page. These filters can be used to search and filter entries on the front end based on the entry field values. To add a Filters block, first select the Entries block, then click the plus icon in the bottom-right of the block. Then, select “Filters” in the pop-up menu.
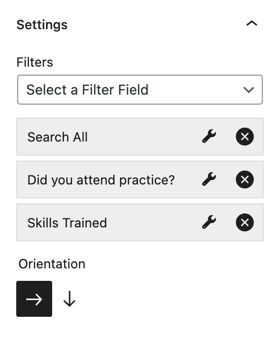
Once added, you can customize the Filters block by selecting which fields to filter on, whether to include a search, and the filter orientation.
The filtering can then be used on your page to make finding the correct entry easy for your users.
Permissions
Who can view entries?
By default, all entries displayed via Entry Blocks will be publicly viewable.
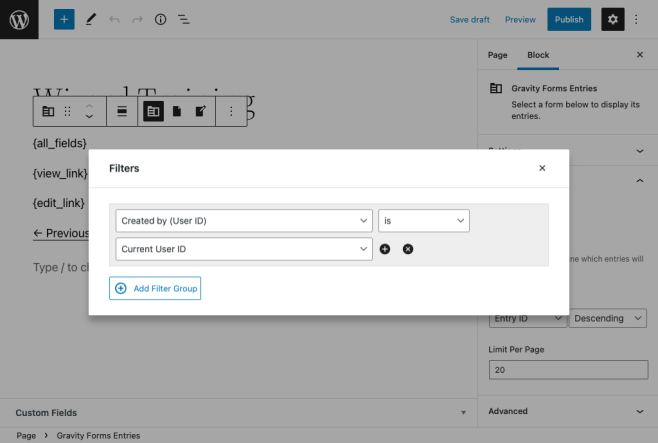
To only show the current user entries that belong to them, add a filter where the entry’s “Created by” property is the same as the “Current User ID”.
Who can edit entries?
The entry owner and any user whose role has been granted the corresponding Gravity Forms capability are able to edit an entry. The “Edit” link will not show up for users who do not have the correct permissions.
Using Entry Blocks in the classic editor and other page builders.
GF Entry Blocks works with other WordPress editors like Classic, Elementor, Beaver Builder, and Divi. This is made possible with Reusable Blocks Extended. Here’s how it works:
 |
Create a Reusable Block and add your GF Entry Block into that. |
 |
Grab the shortcode for the Reusable Block, for example [reblex id='7']. |
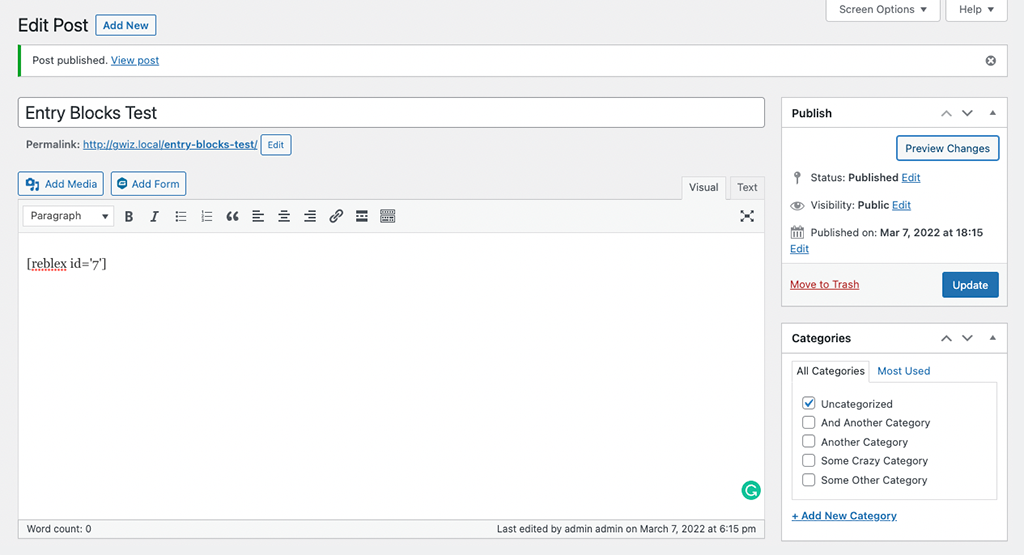 |
Insert that shortcode into your alternative WordPress Editor. |
Known Limitations
- By default, the Entries Table view is not mobile-responsive. Support for this is coming in the future.
- Solution: This plugin can help in the meantime!
Integrations
Gravity PDF
For entries where a Gravity PDF feed is attached, including a link to the PDF is simple. Follow this guide from Gravity PDF to set things up.
Hooks
- gpeb_after_render_block
- gpeb_before_render_block
- gpeb_can_user_edit_entry
- gpeb_cleaned_current_url
- gpeb_delete_entry
- gpeb_delete_entry_permanently
- gpeb_delete_link
- gpeb_display_value
- gpeb_duplicate_entry
- gpeb_duplicate_link
- gpeb_edit_confirmation
- gpeb_edit_entry
- gpeb_edit_form
- gpeb_edit_form_entry
- gpeb_edit_form_field
- gpeb_edit_link
- gpeb_entries_query
- gpeb_entry
- gpeb_entry_duplicated
- gpeb_entry_form
- gpeb_entry_not_found_message
- gpeb_exclude_partial_entries
- gpeb_filter_form
- gpeb_filter_form_field
- gpeb_filter_value
- gpeb_filters_col_rows_query
- gpeb_interpreted_multi_input_field_types
- gpeb_loop_entry_content
- gpeb_notification_content_deleted_entry
- gpeb_notification_content_duplicated_entry
- gpeb_table_row_cell_content
- gpeb_table_row_cell_markup
- gpeb_trash_entry
- gpeb_view_entry_content
- gpeb_view_link


