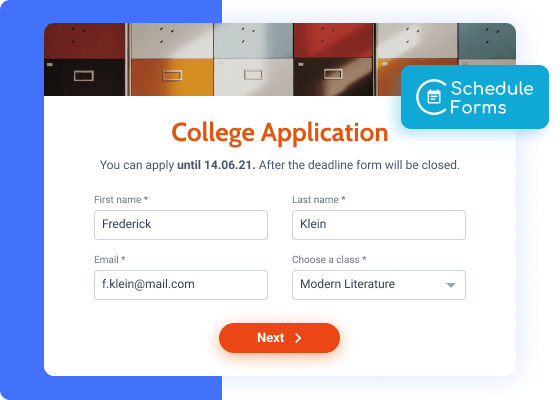
Teaching/tutoring online? You can set up a deadline for students’ assignments to be submitted.
Schedule Forms
A supplementary plugin that lets you set the form availability time frame.
Schedule Forms Use Cases
Host a virtual job fair – offer summer jobs to students by limiting the dates they can apply.
Application forms are time-sensitive, especially when speaking about giveaways and sweepstakes.
Launching a new line/feature/product, a survey form is what you need to collect feedback on short notice.
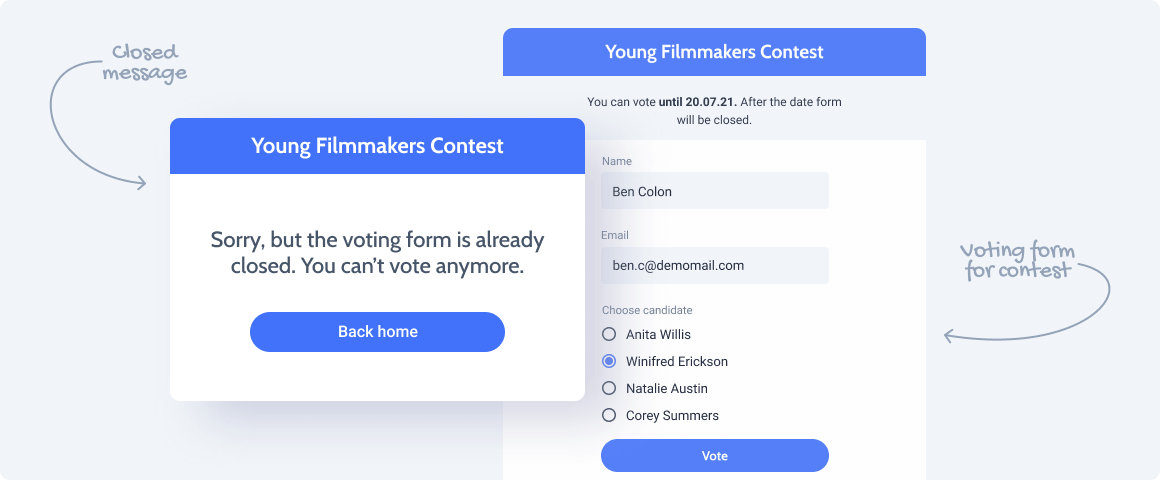
Create a time-limited voting form by setting the From-To dates.
Let the potential attendees know when the registration starts and finishes and accept only those who squeezed in.
Explore Functionality
Scheduled
form display
Shortcodes
in custom messages
Custom
styling
Prevent Default
on form submission
Unlock All Addon Options
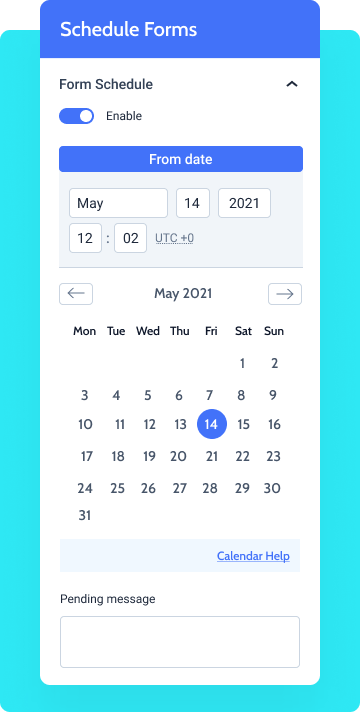
Activate/deactivate this toggle to switch the Schedule Forms functionality ON/OFF.
A monthly calendar that allows you to pick the very month, date, year, and time when the form will be available on the front-end.
A monthly calendar that lets you pick the exact month, date, year, and time when the form will close.
A text that will be shown in place of the form prior to the date you’ve specified in the “From date” area. You can use shortcodes here.
This custom message will be displayed instead of the form after the date specified in the “To date” area. It supports shortcodes.
How to Configure Schedule Forms
To install the addon, go to JetFormBuilder > Addons and find the “Schedule Forms” addon in the All Available Addons section. Press the “Install Addon” button and, once installed, it will appear on Your Installed Addons. Next, click “Activate Addon” to get it ready for further work.
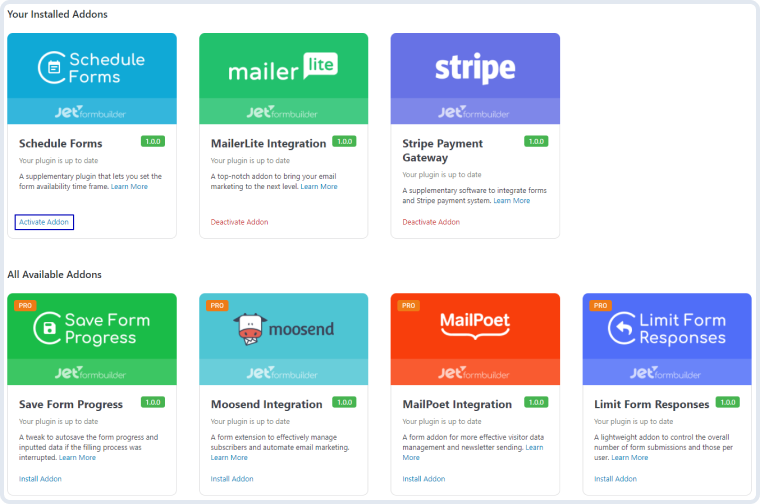
As you can see, all PRO version addons can be installed and activated through JetFormBuilder Dashboard.
After you finish the installation and activate the plugin, the new settings section called Form Schedule will appear. To find it, go to JetForms > Forms and open one of the created forms. In the right-side menu, you will see the Form Schedule section.
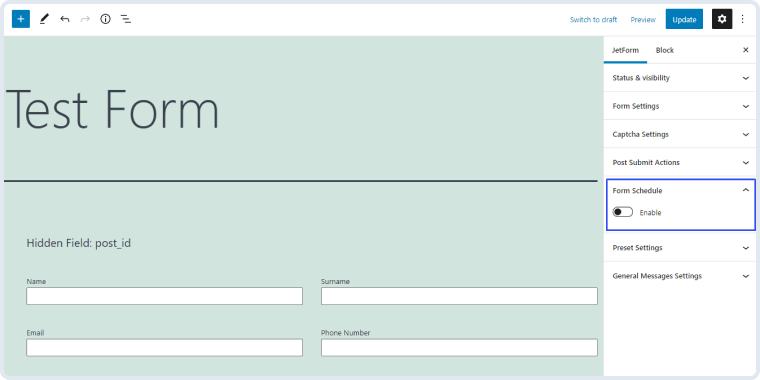
When you turn on the Enable toggle, you will see the schedule settings. If you won’t set the From and To Date, the form will work as usual.
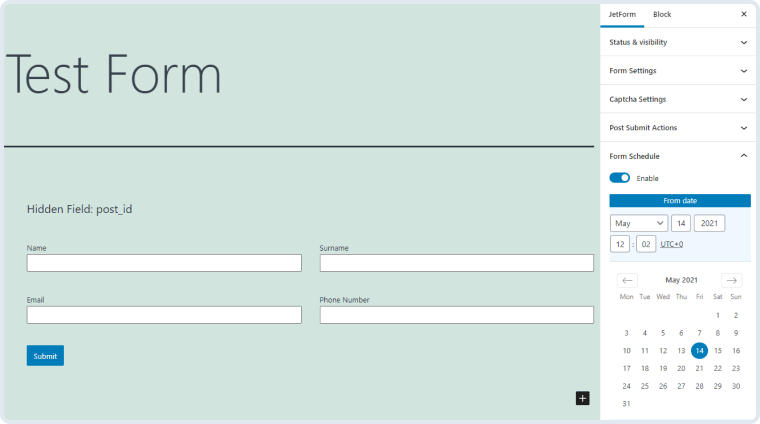
From Date. Here you can set the date, from which the form will be available for clients to fill and submit. Before the date you’ve set, the visitors will see the text you write in the Pending Message text area. If you will set the From Date but won’t set the To Date, the form will become available at the set date and will be always visible to users afterward;
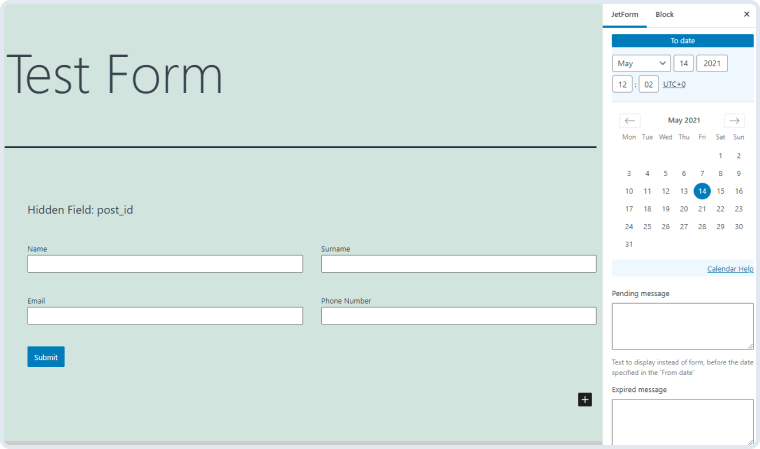
To Date. This is a feature to set the date after which the form will be no longer available to the users. After the date you set, they will see the text you type into the Expired Message text area. If you set only the To Date and won’t set the From Date, the form will be available for the users from the moment of creation and until the date you defined;
Pending Message. The text you write here will be shown to the users instead of the form until the date you set in the From Date field;
Expired Message. Type the text here and the users will see it instead of the form after the date you defined in the To Date field.

